
Broderie Anglaise
Workshop developed by Dr. Sabrina Mark
Online tutorial created by Ruth Ormiston
Broderie anglaise was a well-established embroidery technique throughout the nineteenth century. It is a type of whitework embroidery done with white thread (typically cotton) on a white fabric (usually a plain weave cotton or linen). Its designs are characterized by small, circular holes called eyelets, and it is sometimes called eyelet embroidery as a result. Broderie anglaise is not only decorative, but is also very robust — in the nineteenth century, it was used on lingerie, sleeves, collars, outerwear, and children’s clothing, all items that would have endured lots of wear. Victorians would have embroidered their garments by hand at home and then worn their finished creations. Here’s how to do broderie anglaise at home, just like the Victorians! To read a maker’s reflection by Indiana Humniski, click here.
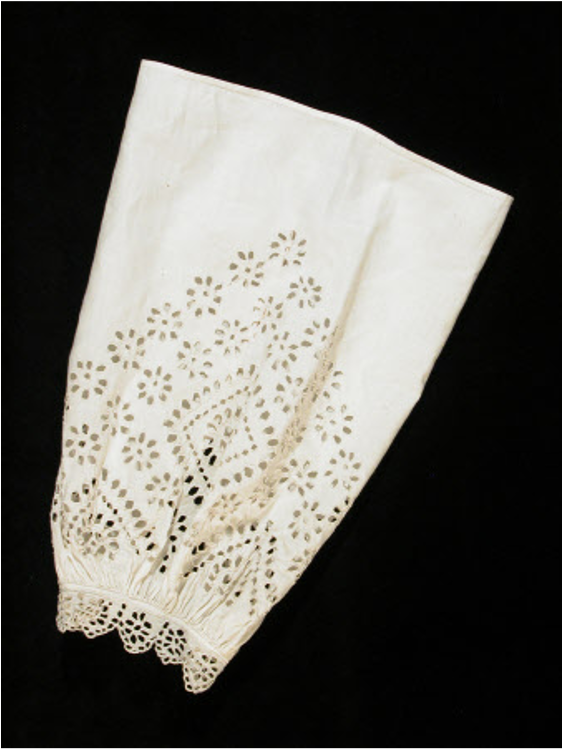
Chemise, 1861-65, The Metropolitan Museum of Art, C.I.42.95.9
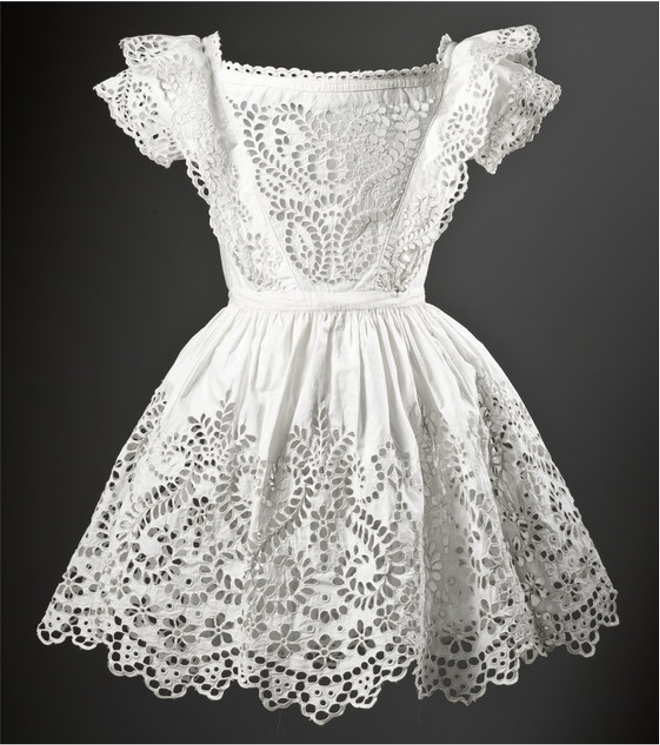
Boy’s Frock, c. 1855, LACMA Collections, M.2007.211.89
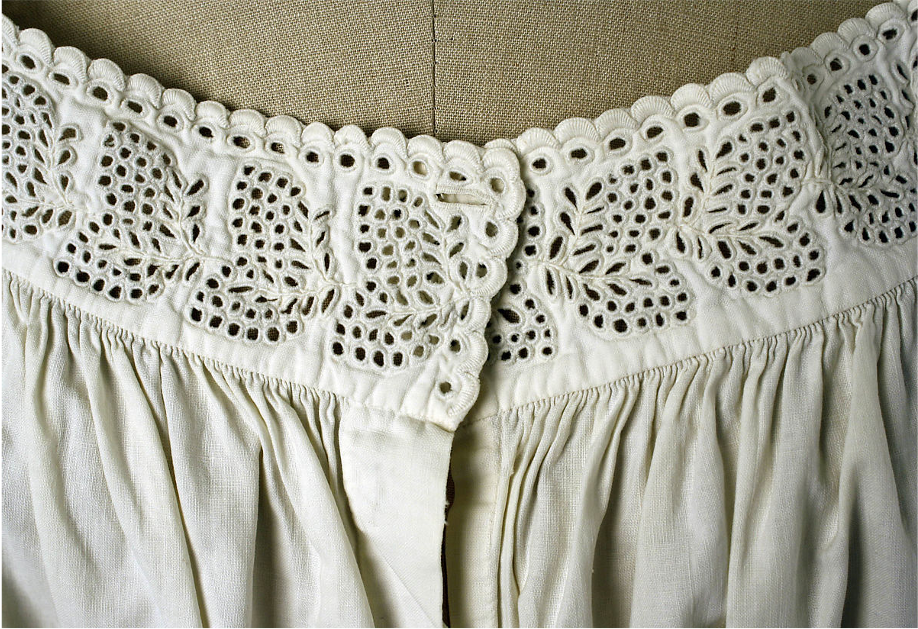
Inner Sleeve, 1860, Killerton, Devon, NT 1360528.2
You will need
A needle
Thread (preferably white; recommended: DMC’s no. 12 pearl cotton)
Any light-to-medium weight fabric, preferably cotton or linen (recommended: white cotton lawn)
Pencil
Scissors
Pointy object (awl, nail, small knitting needle, bamboo skewer, etc.)
Embroidery hoop (optional)
For Instructors: Visit our Crafting in the Classroom page for information on embodied learning, or click here for further resources about this craft.

Pattern in Godey’s Lady’s Book, Vol. XLV, 1852, p. 574, archive.org
Fundamental Stitches for Broderie Anglaise
Backstitch:
A backstitch will anchor your thread in the fabric without leaving any bumps like a knot would.
Thread your needle and take your thread through the fabric from back to front.
Leave about half an inch to an inch of thread sticking out at the back.
Make a small stitch to the right and come back through to the front either where you came out the first time or a little bit to the left. The thread should stay!

Backstitch (front view)

Backstitch (back view)
Running stitch:
After your thread is anchored, guide your needle in and out of the fabric, aiming for even lengths in your stitches.

Running stitch (front view)
Running stitch (back view)
Overcast stitch (or whipstitch):
Working near the edge of your fabric, take the thread through from back to front.
Bring your needle over the edge of the fabric and back through to the front, right next to your previous stitch.

Overcast stitch (front view)

Overcast stitch (back view)
Putting it all together
Broderie anglaise is made up of two main components: making the eyelets and doing the edging (which is typically scalloped).
If you’d like to work with one of the patterns provided, now is the time to trace it onto your fabric in pencil – you can print out the pattern and place it behind the fabric to do this.
Making an eyelet:
Cut off a length of thread longer than one arm’s length (but not longer than two) and thread your needle with a single thread.
Draw a circle on your fabric (~ 0.5 cm in diameter) or choose one of the circles in your pattern.
Anchor your thread on the circle with a backstitch.
Outline your circle with running stitches.
Poke a hole in the circle with your awl/pointy tool.
Reinforce the hole with overcast stitches: Bring your needle into the hole, then up and out on the edge of the circle. Bring it over the edge and back into the hole. Try to make your stitches really close together.
Weave your needle through the stitches you’ve already done on the wrong side of the fabric and cut off the thread.
Poke a hole through the front and back of the eyelet again.

A completed eyelet

A completed eyelet (larger size)
You can use this method to make eyelets that are bigger or different shapes. When working on bigger eyelets, make your running stitches, cut the fabric vertically and horizontally to make the hole, and fold the excess edges into your overcast stitch.
Doing the edges: Blanket stitch
Make your stitches first and then cut out your item along the scallop – do not make your stitches over the edge of the fabric itself! You can also draw two parallel lines to guide your stitches along the scallop shape.
Anchor your thread in the fabric with a backstitch.
Make a big loop with your thread, then guide your needle down into the fabric and back up, catching the loop as you pull the thread through.
This stitch will make a slight ridge on the right side of the fabric.

Blanket stitch (front view)

Blanket stitch (back view)
Filling in decorative elements and shapes: Satin stitch
This stitch follows the same movements as the overcast stitch, but is used to fill in shapes rather than the edge of the fabric.

Satin stitch (started)
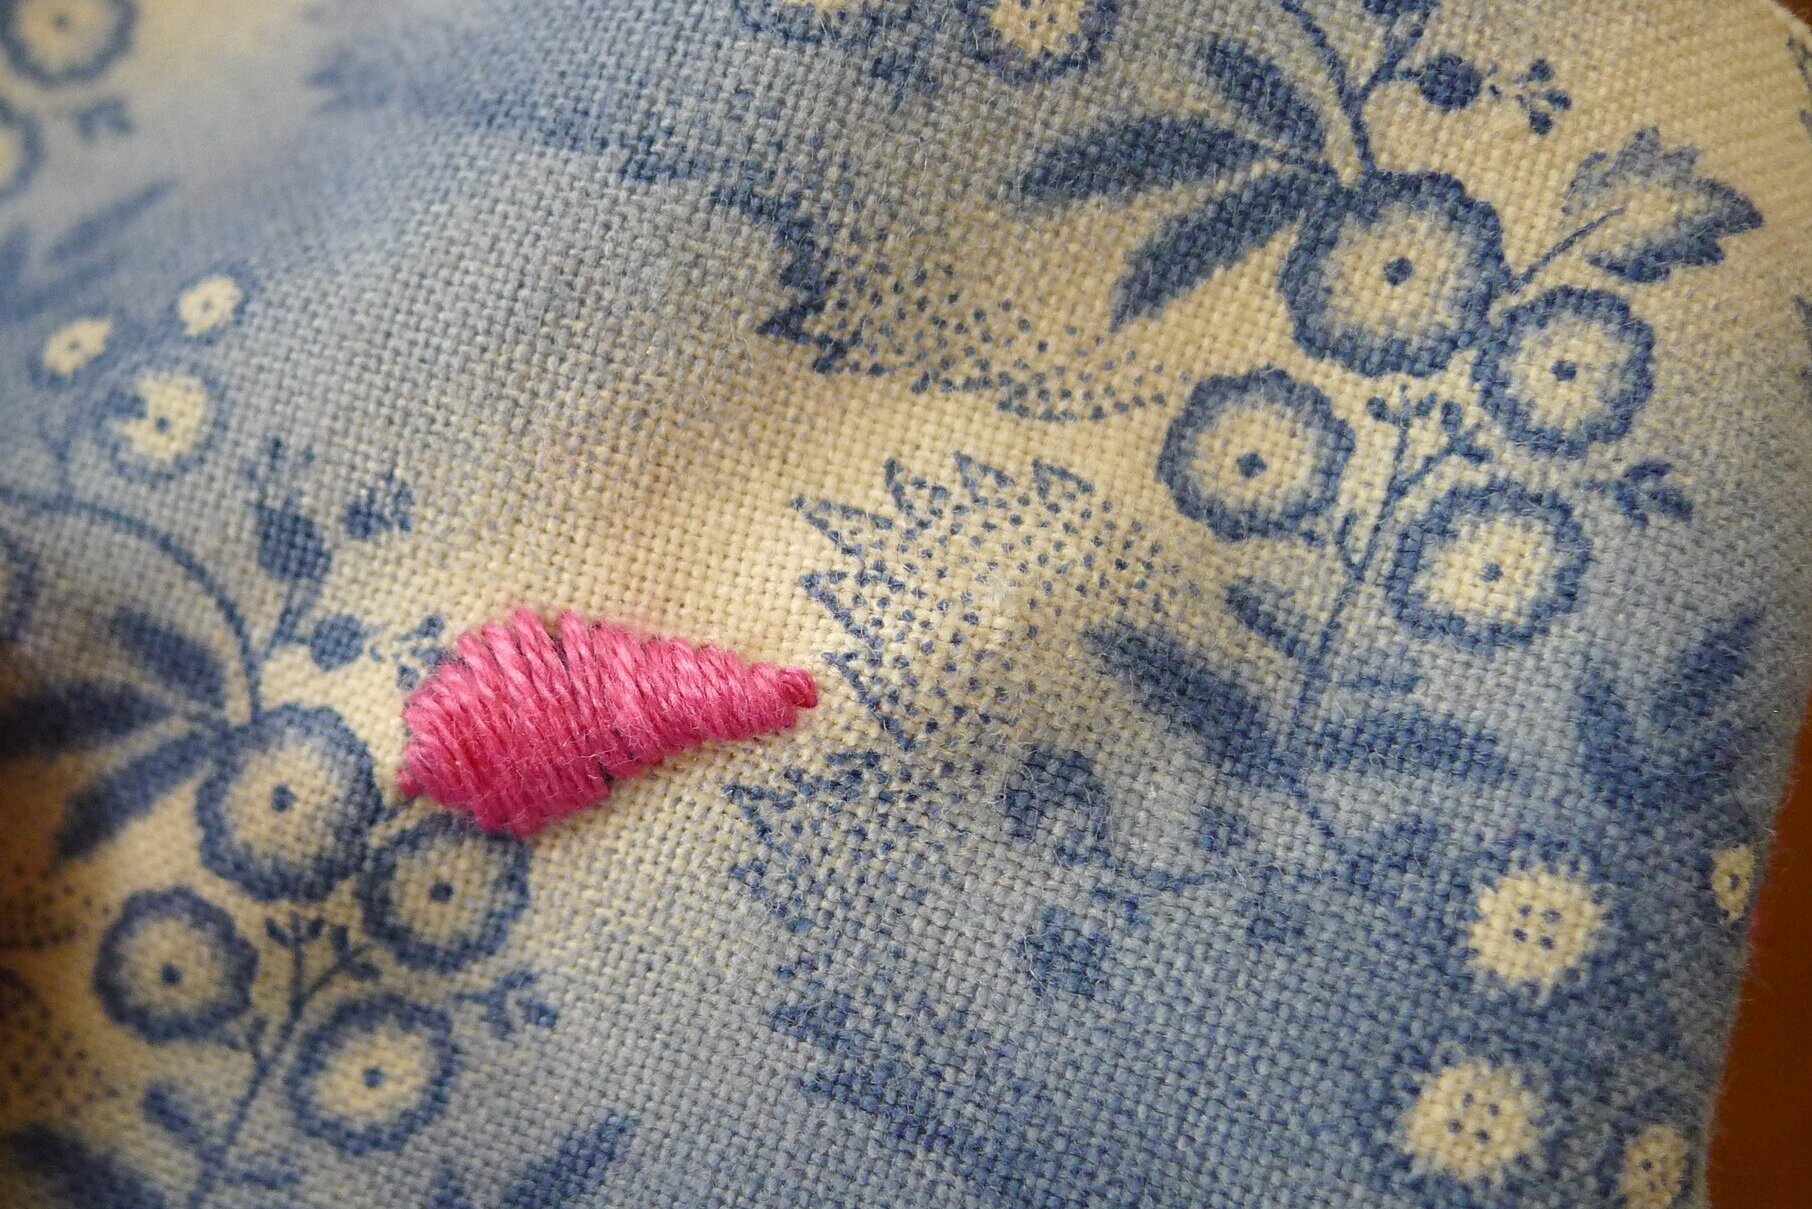
Satin stitch (finished)
Sabrina’s broderie anglaise collar


To read a maker’s reflection by Indiana Humniski, click here.
Please send us your own work-in-progress and/or finished creations! Connect with us on Instagram @crafty_victorians.
Dr. Sabrina Mark

Sabrina Mark is an academic and a historical costume enthusiast. She received her doctoral degree in 2020 from the University of Manitoba. Her dissertation explored mobility and the social roles of girls and women in popular early twentieth century girls' novels, though much of her research combines her interests in literature and historical clothing, such as her MA thesis "Changing Clothes: Female Dress and the Widening Sphere in the Fiction of L.M. Montgomery" and her forthcoming book chapter on the puffed-sleeve dress in Anne of Green Gables. When she isn't reading, enjoying a good meal, or playing with her dog, she spends her time researching and creating historical costumes.